A Photo realistic navigation experience:
A one month navigation challenge
Once in a while we challenge ourselves with a one month experiment. We use those experiments to push the boundaries and sharpen our understanding of what is feasible in this age of open-source software.
This time we chose a GPS navigation experiment. We wanted to see whether it is possible or not to prototype a navigation app, inspired by Waze and Google Maps, by simply integrating open source libraries, open standards and free APIs.
While the result is yet to compete with the one billion dollar worth Waze, this journey has taught us quite a lot. In this post we’ll share some technological considerations, challenges and lessons learned in this journey.
The challenge
The requirements for this experiment were relatively simple and straightforward – we wanted to build a fully functioning GPS navigation web app. Our user wants to reach her destination, so our app is required to let her search for a destination and guide her throughout the journey.
The stack
We chose to base our navigation app on the following libraries and APIs:
- Angular – A structural framework for dynamic web apps.
- CesiumJS – An open-source JavaScript library for world-class 3D globes and maps.
- Angular-Cesium – A JavaScript library for creating map based web apps using Cesium and Angular.
- NgRx – Reactive state for Angular.
- Turf.js – Advanced geospatial analysis for browsers and Node.js.
- Bing Routes API – A navigation API, used to calculate an optimal route between two or more locations.
- Bing Geocoding API – Used to get latitude and longitude coordinates of an address.
- Geolocation – A browser API which allows the user to provide their location to web applications.
- Voice-synthesis – A browser API which enables to incorporate voice data into web apps.
We started the experiment by building a basic Angular app with a basic map component
(Angular + Angular-Cesium + CesiumJS).
Then, we were all set to hit the road.
Choose your companions
The drive behind building the app is developing only a frontend and using public, free to use and free of charge APIs and services as backend. We sought for APIs with Geocoding, Routing and Location to road snapping.
Two APIs met with the basic preconditions: Bing & OSRM. Both are services that provides everything needed for the project and much more. However, a few differentiators lead us to choose BING API:
a. OSRM responses were not consistent enough. We got hit too many times with “too many requests” errors which would lead to a bad user experience.
b. Bing went an extra mile, giving a few more options such as searching for location in Hebrew, which is helpful for our local experience.
How to navigate while sitting in your office?
How can you test a navigation app without moving? Google’s Chrome only provides a “current location” and allows manual override via the Dev-Tools Sensors. A chrome extension was built which calculates a route between two points and injects an interpolated position on the route at configurable intervals and speed. The extension is not tied to the application and can be used to ease development of any GPS route-based application.
The alternative of development of an extension was to incorporate the route simulation as part of the application. We found the extension to be a cleaner approach which doesn’t complicates the core code and require the core code to support two modes (real and simulated/development and production).
Let’s sort things out
A lot of data is being returned from the APIs and it all should be served fast and accurate.
First, a service for geocoding was set, transforming an address typed by the user to lon/lat coordinates. Then a service for routes was developed, calling BING’s Routes API with source and destination and getting back the optimal route. Then, data was needed to be transformed from raw data to an actual route object.

Let’s start navigating
Both in the app, and on the map.
We started building the application from scratch and first started with the architecture and user interface. The main parts are the map, instructions bar, a search pane, services and of course the NgRx store.
The services were designed to do the heavy lifting – getting the current user location via Geolocation API, calling the APIs and carrying out the calculations. The user actively interacts mainly with the search pane which searches for a destination.
The app is required to support mobile as well as desktop. Through early testing we found out that Safari on iOS doesn’t support CSS flex-box, which caused the app to be less responsive and functional. Setting the webkit flex-box didn’t help either so we made a few CSS workarounds.
Now the app was ready for the next steps – implementing the logic.

Where to?
To the next waypoint.
The Routes API provides the key waypoints and the maneuvers needed to be taken along with a detailed route shape.

For every GPS location update we are required to update the instructions. The instructions include the remaining distance (to next waypoint and to the destination), the next waypoint and bearing for camera positioning. At first we considered using the Routes API for every waypoint on the route but we shortly came across two problems:
a. API requests take time, occasionally longer than a user noticing threshold which leads to bad experience.
b. Bing Routes API is limited to 125,000 per year using the free license.
So how do you calculate progress throughout the route?
We first matched the maneuver waypoints to the detailed route shape (line-string). This allowed us to understand where each location is regarding the route and using indexes to easily iterate through the route.
Next we needed to calculate the next instructions for every GPS location update. The first challenge is snapping the GPS location to the route. A GPS location can be noisy and there is always a difference between the real world road and the route the API provides. Without snapping the instructions would be all over the place.
The second challenge was calculating the distance between the GPS location and the next waypoint. A simple distance is simply not good enough in this case as it doesn’t take into account route path (road curvatures).
Turf.js was used for these calculations. Nearest point on line was used for snapping and Length was used for distance calculation. The length functions receives a line-string shape and two points and returns distance along the line.
The next waypoint (index), distance to it, distance to the destination and bearing are dispatched to the store. The app components automatically receive the updates and display them as text (distance, next maneuver, etc.), voice and on the map.
When to?
In addition to text instructions we also wanted voice instructions. We used the voice synthesis API and Route’s maneuvers text but encountered the challenge of when to play the instructions.
We used a simple heuristic to calculate the right time to start playing the next maneuver voice instruction:
Minimal distance before a maneuver divided by the vehicle’s average speed + the time it takes to play that instruction. The minimal distance should also be different for different road types. For example on a highway voice instructions should be 1KM before an exit while in a city voice instructions should be 200m before turns.
Maps
We used Cesium’s built-in maps which are great for most usages.
We found the app to look good with Bing Maps Aerial and with Mapbox Streets Classic maps.
Photorealism
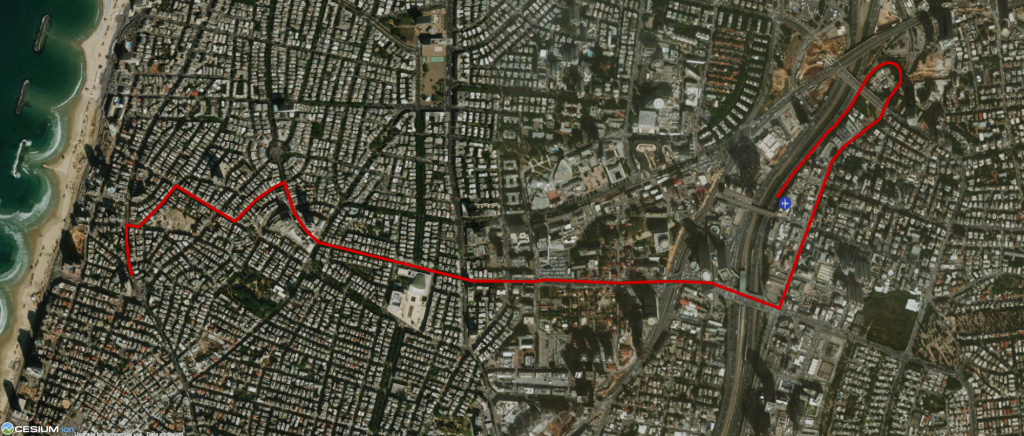
We are navigating, everything is georeferenced correctly and we have a map but it’s not the photorealistic outcome we strived for, something is missing. We called this app “Phraze” as we wanted to achieve photorealism (Phraze stands for Photo realistic Waze).
We considered three measures to achieve photorealism (we ended up implementing only the first two):
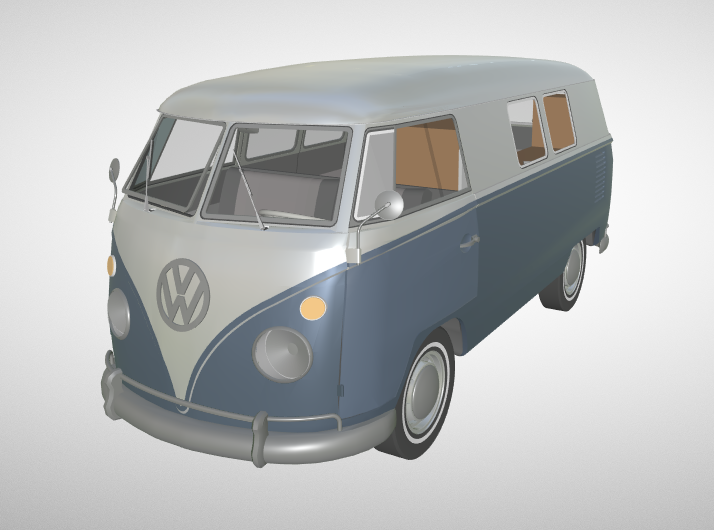
- Visualizing user location with a 3D model of a car.
- Adding 3D building models to the 2D map (projected on Cesium’s ellipsoid).
- Using realistic 3D maps, including terrain and realistic city 3D models.
For visualizing the user location we used a 3D model of a Volkswagen type 2 bus.
For 3D building we chose the following path:

Cesium supports 3D-Tiles which is a web streaming specification of spatially large 3D entities. We wanted to use the technology to display buildings.
The 3D format defines tiles in a spatial tree structure. The tileset is a json describing other tilesets and tile data. In a nutshell a tile defines a bounding box, sub tiles with better details and data such as 3D models.
Traditional GIS data such as buildings are usually in formats such as shapefile which are not web friendly and are not stream-able. We found a great easy-to-use tool for converting shapefiles (and other formats) to 3D-Tiles. Next we needed to find a shapefile with buildings.
There are many shapefiles with building from sources such as OSM and Diva-GIS but none of them had easy to use height data for the buildings which didn’t help. Thankfully Tel-Aviv city has an awesome GIS mapping website which allows to view and download layers as shapefiles limited by number of features.
Once we downloaded the shapefile, conversion was simple and created a directory in 3D-tiles layout. Now all we needed was to statically serve the files to our app.
NgRx
Throughout the whole process, the benefits of using NgRx were significant in keeping a single source of truth, adding new components, refactoring components, keeping the app safe from miscalculations, glitches and basically holding everything together.
What’s next?
The experiment was successful and educating, but Phraze is yet to reach its destination. An endless list of additional features can be considered, such as: Enabling other navigation methods (walking, bicycling and transit), adding 3D buildings with texture, terrain display and correctly clamped buildings, recalculation of route in case of deviation, adding traffic updates, adding tweets according to the user’s location and other small features such as display units (KM and meters), next maneuver’s sign, speedometer, etc.
Stay on route
Want to look at the source code or contribute? Come say hello at our github repo.
Have a question, remark, a wonderful suggestion? This blogpost comments section is open and waiting for you.
Want to do business with us? Contact us at webiks@34.221.203.157.
Feel free to follow our Linkedin and twitter accounts.